This guide provides step by step instructions on how to configure the FluentSMTP WordPress plugin to send email using SMTP2GO’s API for improved email delivery.
Step 1
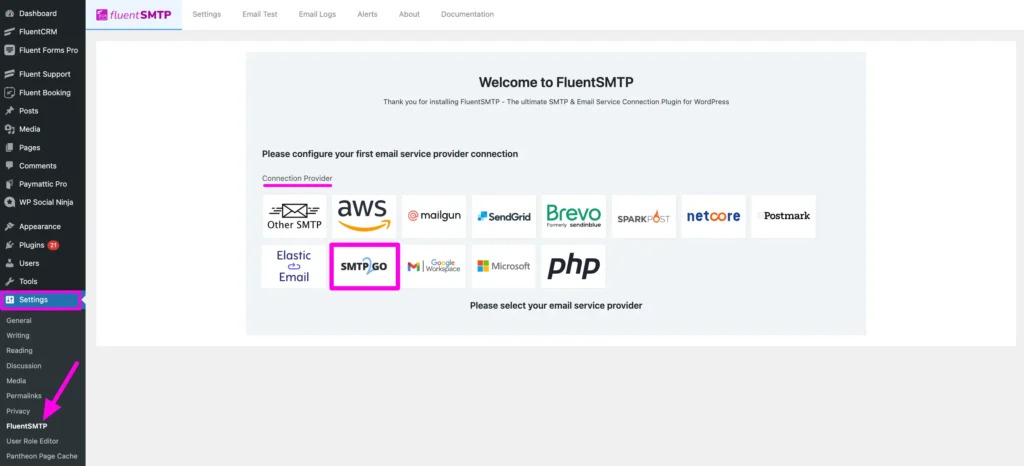
After installing the FluentSMTP plugin, in your WordPress dashboard navigate to “Settings > FluentSMTP” in the left-side menu.
Select “SMTP2GO” as the “Connection provider“.
Note: If you are already utilizing the plugin and connected to another service provider, go to the “Settings” section from the FluentSMTP top navigation bar, click the “+ Add Another Connection” button and select “SMTP2GO“.
Step 2
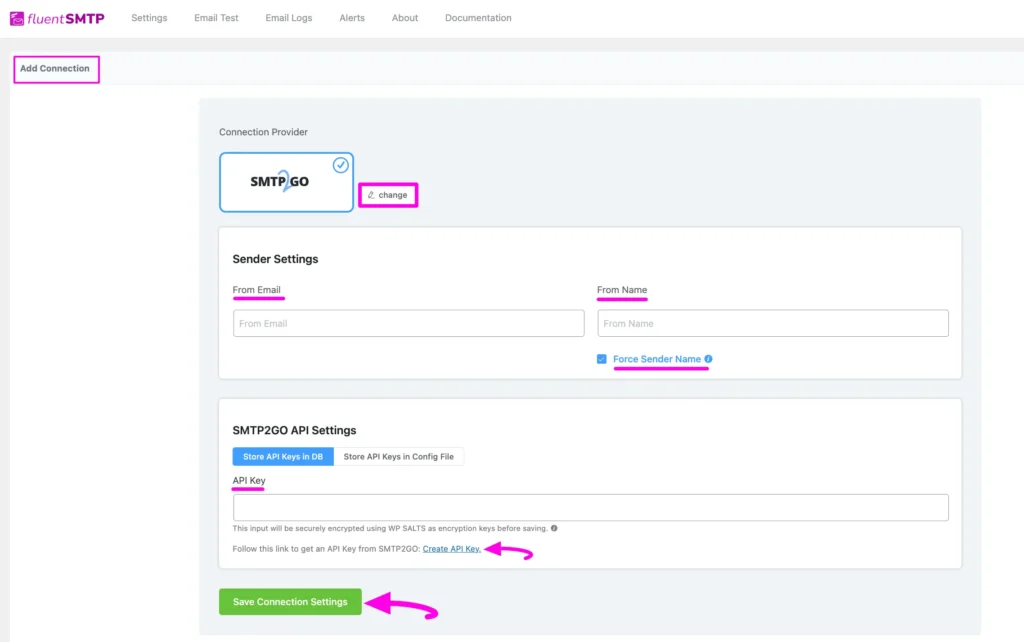
After you choose SMTP2GO as the provider, it will take you to the “Add Connection” page, where you will add the required details to connect to SMTP2GO. This includes:
- From Email: The “From” email address you will send from.
Note: This needs to be a verified sender in your SMTP2GO account. It is recommended to send from an email address that has the domain verified as a “Sender domain” as this will ensure optimal delivery rates by having SPF & DKIM alignment.
- From Name: The name you want to display with your email address. This can be your name or a company name for exmaple.
- API Key: Enter an API Key that you obtain and manage in your SMTP2GO account on the “Sending > API Keys” section.
Finally, click the “Save Connection Settings” button.
Integrating FluentSMTP with SMTP2GO should be an easy, quick and, hopefully, painless process. You can view FluentSMTP’s setup guide for further details.
Alternatively, check out SMTP2GO’s WordPress plugin.
You can access reports directly in your SMTP2GO dashboard, which will help you understand delivery successes and failures, tracking information and many more useful metrics. We’ve written some great articles outlining the features of your SMTP2GO account and we recommend taking the time to see everything we have to offer.
Should you need extra help from our award-winning support team, we are almost always available to assist. You can find support contact details in your SMTP2GO dashboard and information about retrieving your support PIN here.
Ready for better email delivery?
Try SMTP2GO free for as long as you like:
Try SMTP2GO Free → Paid plans available for over 1,000 emails/month.