One of the features that we offer to our high-volume users is IP Pooling.
IP Pooling allows you to organize and categorize your dedicated IP addresses to improve deliverability. Doing so will help your emails to land in the inbox and to avoid those pesky spam filters. Many of our users choose to send their marketing emails from one IP address, for example, and their transactional emails from another.
All of our high-volume plans automatically come with one dedicated IP address, but you have the option to purchase more as you need them.
With multiple IP addresses, you can assign SMTP usernames, authenticated email / IP addresses, and API keys to an IP pool. This will help spread email load among the IP addresses in the IP pool.
To do so, please follow these steps:
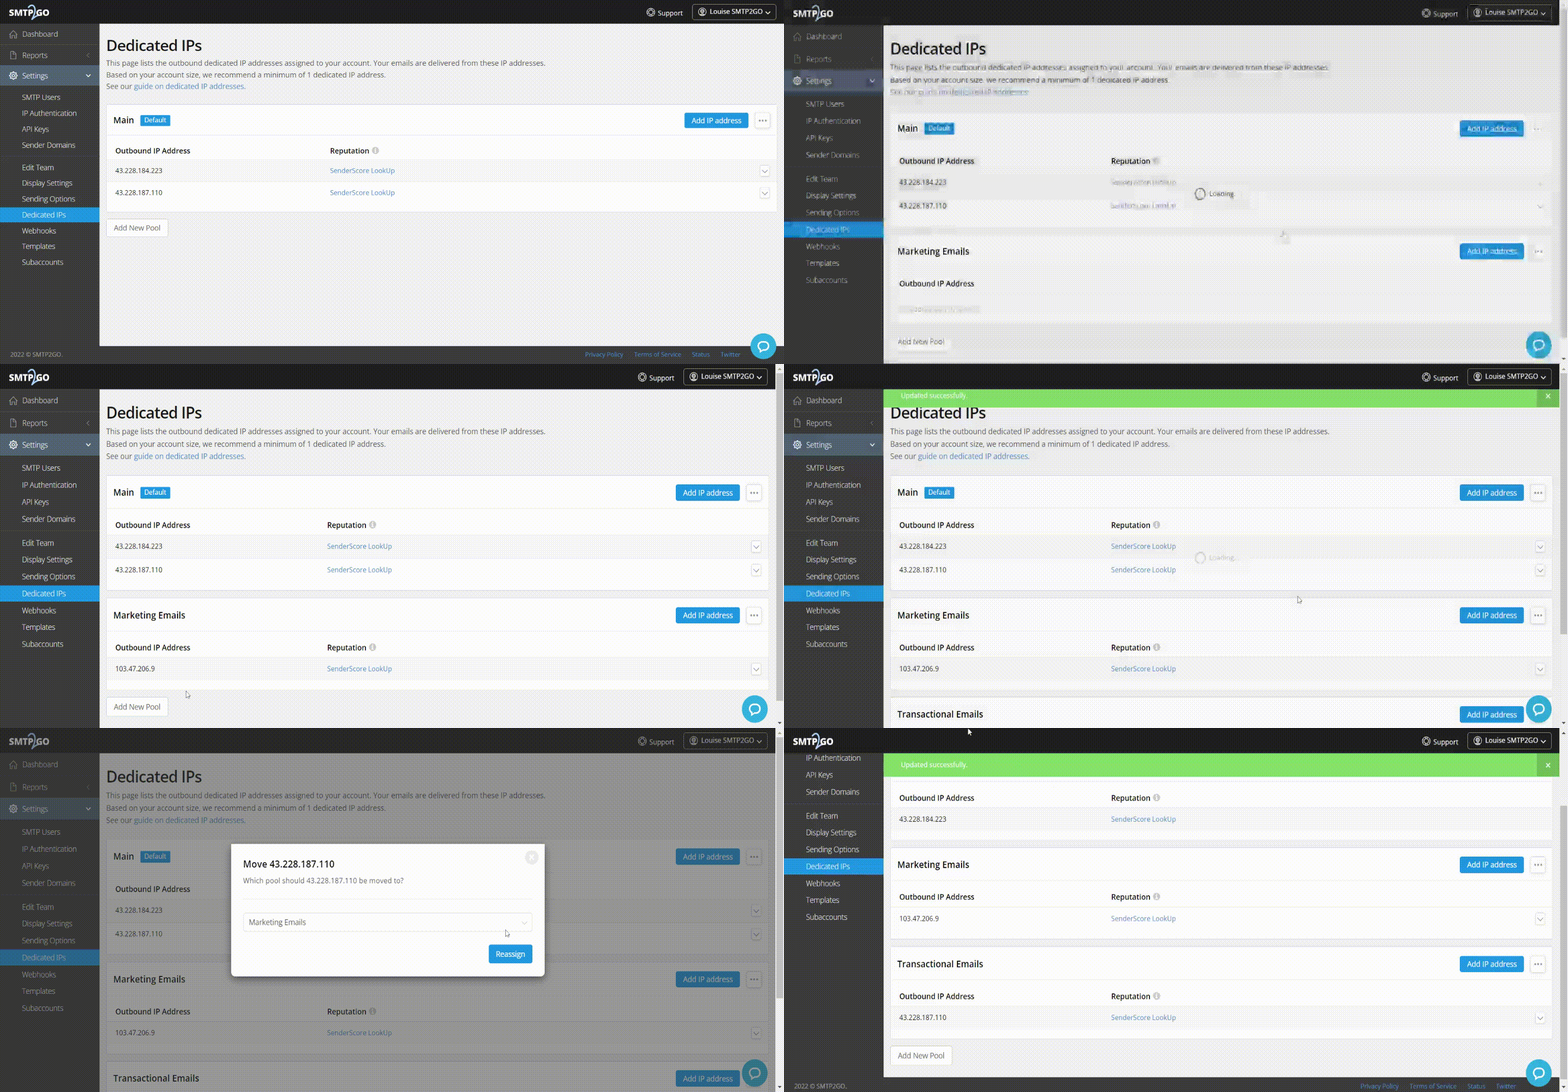
- Go to Settings > Dedicated IPs
- Click on Add New Pool
- Name your pool and click on Add Pool
- Then, under that heading, click on Add IP Address
- Choose how many IP addresses you would like, and click on Purchase
If you already have multiple IP addresses, you can reassign them to a particular pool. Click on the down arrow beside the IP address, and select Move to Pool. Choose the relevant pool name and click on Reassign.

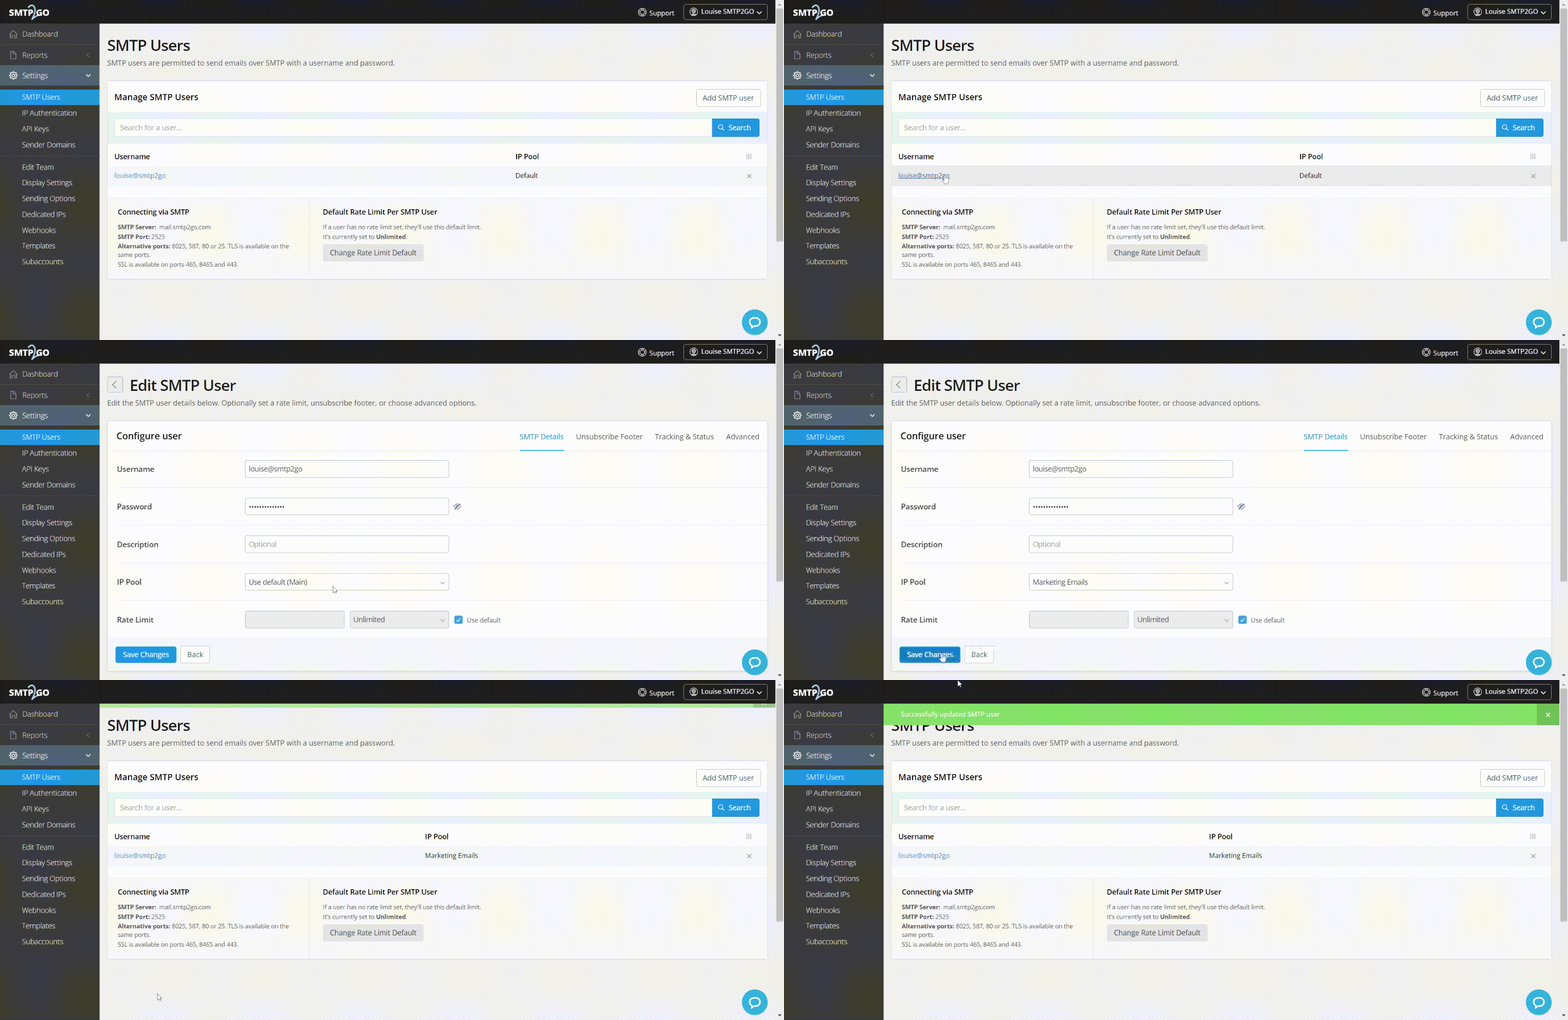
You can then choose to assign the IP Pools to specific SMTP users, email addresses, or API keys via the following sections of the user dashboard:
Settings > SMTP Users

Settings > IP Authentication

Settings > API Keys
If you’d like any further assistance with this, or if you have any questions regarding the process, please don’t hesitate to get in touch with our friendly support team!


